Exciting news! Leigh and Matt (you might remember them from the post about painting...or more than likely you know them in real life) are engaged! Though I have known for a little while now, it was so hard keeping this huge secret a secret. Now that the cat's finally out of the bag, here's a little summary of their relationship. Congratulations, Leigh and Matt!
Mazel tov!
February 17, 2010
February 13, 2010
Happy Valentine's Day!
I normally don’t get into Valentine’s Day very much. But I recently painted a old brass lamp a wonderful shade of cherry red and my new front entry table was calling for a Valentine’s day makeover. Plus my friends Marc and Susan were bringing their family up to Louisville for a visit, and I have always loved crafting with their daughters Olivia and Adelle. A heart-shaped craft project with the girls seemed to fit the bill on a snowy Sunday afternoon. So I guess you could say that this year I did get into Valentine’s Day a bit.
First up, we’ll start with the entry table display. (Sorry for the poor quality of the pictures. I shan't use this camera again.)
For winter I had some berries, some pine cones in a vase, and a cute little hand-blown piece of glass I made in college.
One of my favorite elements of any table setting are glass vases. They come in a variety of shapes and sizes, and it’s so easy to change out the filler depending on your mood or the season.
For instance, pine cones in January…
… are replaced with heart ornaments in February. A big change in your look that only takes about 10 seconds!
With the addition of the new (old) lamp, a silver tray Roommate gave me out of her booth at the Peddler’s Mall, and a picture in a red frame of my dear friend Emily and me in London, suddenly you have a festive Valentine’s Day table. Total cost: $2.95 for the heart ornaments at Hobby Lobby.
And what is Valentine’s Day without love and lots of pink construction paper?
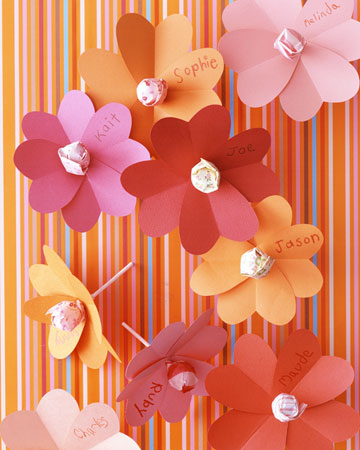
The Reyes Family came up for visit a couple of Sundays ago. After a delicious Cuban lunch at Havana Rumba, we came back to my house for some crafting. I must admit that craft time was my idea. I had seen these cute lolly-pop flowers on Martha Stewart’s website and had been itching to make them. Olivia and Adelle were the perfect “excuse” to take on the project.
We spent the afternoon drawing and cutting hearts...
...and even pulled out the paint
... and glitter and glue gun.
Felix was overwhelmed by all the pink but handled the situation well.
In all the excitement I forgot to take pictures of our finished product, but will update this post soon when the images. Thanks for coming to visit, Reyes gang! You are welcome back any time.
And Happy Valentine’s Day!
February 08, 2010
Reveal #1: Who knew painting could be so fun?
You’ve seen the "before" (or if you haven’t, check it out!). Now we start the fun part: the "after"! First up: paint.
Some people hate painting; I actually enjoy it. What I don’t enjoy is choosing the color. Too many choices.
21 paint chips in both the guest room
and another 16 in the master
You might think that those pallets look pretty similar. They are. While some people might like a crazy color pallet, I wanted only two or three colors and they had to look good together as you walk from room to room. I like blues (especially with the pale yellow already on the walls and that I planned on keeping) and I knew I wanted to go with a colonial look in the guest room. A friend at work mentioned how she once had a dark gray bedroom and how much she liked it. Sold.
After deciding the basics (blue and gray, which both look good with yellow), I had to pick a paint color.
After narrowing the multitude of choices down to a more manageable number, I bought 3 samples for each room and put them up to live with a few days.
You want to see how the paint looks up on the wall (ALWAYS looks different than at the store or even in the can). Make sure to see how the light changes how the paint looks throughout the day – that lovely sage green you like might turn neon in the harsh light in a west-facing room.
Rather than painting and priming in two steps, I chose the new Behr paint with the primer already built in to save a step. Brilliant! Note: Behr does not sponsor Musings from the Front Porch. I wish they would...
Painting is way easier when you have help, so I invited my sister Leigh and her boyfriend Matt up for the day to see the house/make them do work.
Matt was in charge of the roller. Tip: always roll in a “W” shape for the most even coverage.
Looking good, Matt!
Leigh started out with a roller too but wasn’t having much fun…
…so we sent her out to paint the chandelier (more on that in a future post).
I was in charge of the trim. We started out taping, but not worth it. Just use a small, angled brush and go slowly. Don’t rush! Note: I was very excited about painting and went way too fast on the trim. That’s why there are no pictures of that.
We won’t do a full reveal of the bedroom, but here’s a little snippet of the wall color.
And a taste of the guest room (done at a later time with help from Rachel and Roommate)
Final note about painting: don’t get too “helpful” with your tips or Matt/your painter will look at you like this
Some people hate painting; I actually enjoy it. What I don’t enjoy is choosing the color. Too many choices.
21 paint chips in both the guest room
and another 16 in the master
You might think that those pallets look pretty similar. They are. While some people might like a crazy color pallet, I wanted only two or three colors and they had to look good together as you walk from room to room. I like blues (especially with the pale yellow already on the walls and that I planned on keeping) and I knew I wanted to go with a colonial look in the guest room. A friend at work mentioned how she once had a dark gray bedroom and how much she liked it. Sold.
After deciding the basics (blue and gray, which both look good with yellow), I had to pick a paint color.
After narrowing the multitude of choices down to a more manageable number, I bought 3 samples for each room and put them up to live with a few days.
You want to see how the paint looks up on the wall (ALWAYS looks different than at the store or even in the can). Make sure to see how the light changes how the paint looks throughout the day – that lovely sage green you like might turn neon in the harsh light in a west-facing room.
Rather than painting and priming in two steps, I chose the new Behr paint with the primer already built in to save a step. Brilliant! Note: Behr does not sponsor Musings from the Front Porch. I wish they would...
Painting is way easier when you have help, so I invited my sister Leigh and her boyfriend Matt up for the day to see the house/make them do work.
Matt was in charge of the roller. Tip: always roll in a “W” shape for the most even coverage.
Looking good, Matt!
Leigh started out with a roller too but wasn’t having much fun…
…so we sent her out to paint the chandelier (more on that in a future post).
I was in charge of the trim. We started out taping, but not worth it. Just use a small, angled brush and go slowly. Don’t rush! Note: I was very excited about painting and went way too fast on the trim. That’s why there are no pictures of that.
We won’t do a full reveal of the bedroom, but here’s a little snippet of the wall color.
And a taste of the guest room (done at a later time with help from Rachel and Roommate)
Final note about painting: don’t get too “helpful” with your tips or Matt/your painter will look at you like this
February 03, 2010
Short post...
No time for a long post today, but heading to Hobby Lobby to pick up a piece of art (and by "piece of art" I mean a 2009 Kentucky Derby poster) I had framed. Still deciding where to hang it, but will post pictures when I figure it out!
Have a good night,
m
Have a good night,
m
Subscribe to:
Posts (Atom)